|
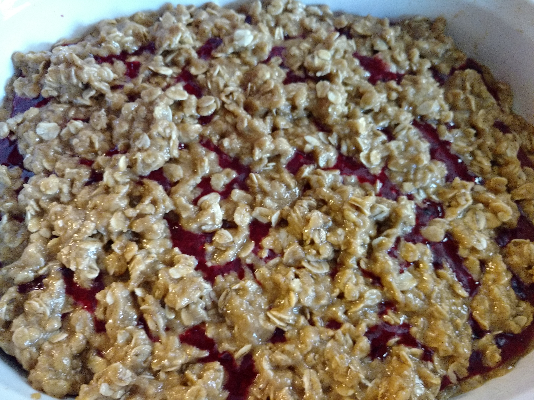
Next year, my goal isn't going to be just to blog each week; it's going to be to blog on the same day each week! I'll get there...maybe. This week, I was so excited to post my successful wheat-free brownie recipe...or my first-try wheat-free chocolate chip cookies...or a discussion about glycemic load and the carbs in different wheat-free grains...and on and on. Instead, thanks to a great read I happened upon over at The Kitchn, I decided to post an actual well-tested recipe. It's inline with a downloadable PDF again, because updating my software and templates is just so far down on my to-do list these days. 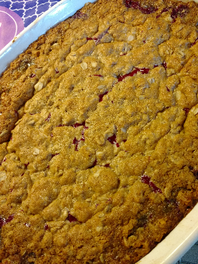 Baked jam cobbler, mixes in 10 and bakes in 20, just in time for a good autumn tea or cider break. This recipe is for leftover jam cobbler. It's inspired by the Pomona's Universal Pectin recipe for any kind of jam and oatmeal bars. Their delicious recipe uses butter and flour; my adaptation turns the bars into more of a crumb pie/fruit crisp with oats, wheat-free flours, and a small amount of applesauce and oil. Extra bonus, if you make your own jams or not: you can use this recipe with any type of fruit preserves, so save the dredges of your containers and mix them all together into this yummy dessert...or breakfast...or midnight snack. You might notice that I'm relying heavily on oats now that I'm afraid to open the APF jar in my kitchen. Are oats enough to replace wheat? Simple answer: no. Even GF oats, for my friends with celiac. First, you will get tired of them quickly! Second, I've learned fast that it's better to mix flours for texture and for nutrition. But, oats are easy. And I'm just starting to not panic about the joy of cooking without so many old favorites. So, here's another oat-and-almond success. Enjoy! INGREDIENTS Crust: 3/4 cup gluten-free oat flour (I use Bob's Red Mill) 1/3 cup tapioca starch (any starch will do) 1/3 cup almond flour (or replace with more oat flour or chickpea flour for almond allergy) 1 cup brown sugar (you can reduce this to taste if you watch glucose levels) 1/2 tsp salt 1-1/2 cup rolled oats 1/2 tsp baking soda 1 tsp vanilla scant 1/2 cup canola oil scant 1/2 cup jarred, unsweetened applesauce FIlling: 1 cup leftover jams (runny remainders are great for this, but thick new jams work too) 1/4 cup cornstarch (use as little as 1 Tbsp for thick jams and the cobbler will still bake up) 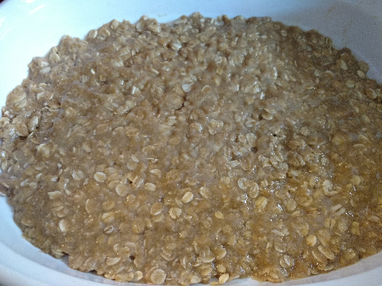 The bottom crust should be spread thinly and, if you want, just barely up the edges. BOTTOM CRUST DIRECTIONS Preheat the oven to 400 degrees. Lightly grease a medium casserole dish. I use a 7 x 10 Corningware-style dish. In a large bowl, use a wooden spoon to combine the dry ingredients of the crust. Make a small well in the mixture and add the vanilla, oil, and applesauce. Use two forks to drag the liquids through the crust mixture to make a crumbly texture (similar to cutting in butter). I like to turn the forks over and pull them away from the middle of the bowl in different directions. Use your hands or a spoon to scoop almost exactly half of the crust into the prepared dish. Wet your fingertips and press the mixture lightly into a crust shape, from the middle toward the edges of the dish. This crust should be just thick enough to cover the bottom, not thicker. 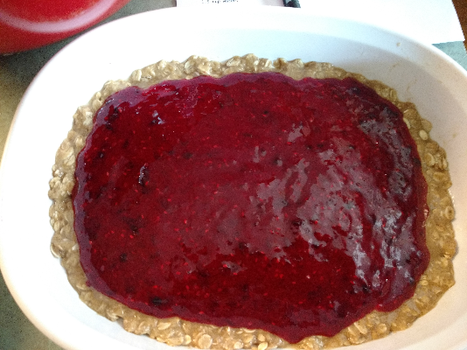 Spread the filling across the crust but leave a small edge. It doesn't have to be perfect. FILLING DIRECTIONS In a separate bowl, combine the jam and cornstarch, stirring or whisking until cornstarch is evenly distributed and not lumpy. The mixture will thicken with the oven heat. Use a spoon to spread the filling across the bottom crust, leaving about 1/8-inch edge without filling.
TOP CRUST DIRECTIONS Wet your fingers again and drop the rest of the crust mixture onto the filling in small sprinkles or crumbles. This will not look like it's going to work! You should have enough crust mixture left to almost cover the filling, with some holes. It's most important that your edges are covered with the crumble (but the result tastes just as good if the filling leaks out!). If you have a hard time with the wet mixture, it's okay to incorporate a bit more oat flour to the top crust mixture, too. The entire recipe is very forgiving of measurement estimates (which could be why I like it so much!). Place the dish uncovered into the oven for 20 minutes (or until the edges are dark brown, if you like crispy crusts). Remove the dish to a cooling rack for at least 15 minutes. This can be served warm with spoons, or it can be chilled and sliced later on.  Yep, same photo as the top. Because it's that kind of day. And it's the only photo that turned out before we dug in. I have grand plans to make or find some favorite wheat-free flour mixtures to keep on hand. I think this one will come in handy for the autumn crisps and maybe even for winter pies. If I decide to try vanilla powder, I can mix it in with all of the crust's dry ingredients and have a ready-made crust that just needs a liquid to come together. I'm seeing apple juice and canola with my fruit crisps, orange juice and olive oil with a sweet potato pie...so many possibilities! I wish I were organized enough to put them here as updates to the post when I try them. Maybe that will be the writing goal for 2019. :-) What will you make with the crust? Do you have a favorite jam or other filling to try?
2 Comments
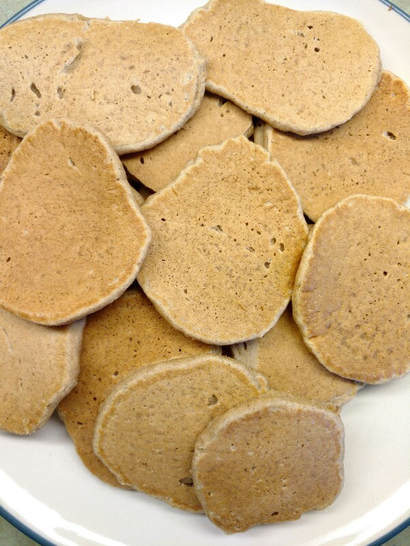
One pancake batch goes a long way in silver dollar sizes! Our best batch used Bob's GF oat flour and some cornstarch and psyllium for binding and texture.
I’ve been eating a lot of oats lately. Not just oatmeal, either, or even just oatmeal cookies (yum). It started out that way, though: a nice bowl of hot oatmeal, graduating from instant to quick rolled to quick Irish to steel cuts. Using some in our cookies, scones, crisps. Without yeast, I was still making flatbreads and quick breads with traditional wheat flours. Without wheat now, too, though, oats have become much more important in our house.
In the past 2 months, I’ve experimented with home-ground oat flour, certified gluten-free oat flours, whole oats, toasted oats, overnight oats. You name it. I’m just diving into this wheat-free world, and I’d like to hang onto as many other grains and proteins as I can. That means I’ve also been trying rice flours, corn flours, bean flours, and more. Oats are a personal favorite, but even I can get sick of them. For now, I hope that some examples of how we’ve played around with oats in new recipes will help others out there who might be trying to eat fewer wheat-type products, or who are looking for variety in their whole grains, or who just like oats more than for breakfast alone. Enjoy!
The (very short) making-flour learning curve:
Homemade ground flour: I tried my blender/processor instead of a coffee grinder. Not bad. Gritty, too coarse, though. Also dusty. And I have more to clean afterward. With prepacked flour widely available (and certified GF for any of my baking adventures for friends with celiac), I’m not doing this again unless I run out unexpectedly for personal baking! Bob’s Red Mill: NOW I understand how important this company’s products are. We liked them before as a family without nuts, eggs, dairy, seeds. Without wheat, though, I’m turning to Bob’s oat flour or steel cut oats every single day. Their blog and podcast are particularly fun for bakers and cooks of any kind, custom eater or not. Plus, he and his team are just nice. McCann's Irish oats, quick cooking: These have become our new kitchen staple. I can make my own basic oatmeal for morning customization in a jiffy, and I can tweak the recipe on the back of the box to make without any of our allergens. Win, win. I just wish the boxes were bigger.
My First Wheat-Free Recipe
It’s really not a long weekend without pancakes. My husband would say waffles. But I make the food, and pancakes are easier without eggs. Plus, I can make enough to freeze some for later, which is a nice surprise for everybody. Waffles seem to disappear in this house before the iron is cool. Anyway, I found myself newly wheat free and facing a morning of making pancakes for my family and going without. I’m quickly prone to become a martyr in such circumstances, but I’m working hard at self care equal to what I’d do if my kids went wheat free (or at least close). They’re great at reminding me to do that, too. ? So, Google. I came across a lot of great research about wheat replacement, and I’m still trying to gauge all of it and sort it in my brain and on paper. But I saw very early on a recipe by a chef, Dana Slatkin in 2012 for vegan almond pancakes. We can have almonds, now (mostly), and the eggs and butter were already replaced for me, so I was in.
I learned a lot about going gluten free from just this recipe. And it took a few tries to get the right texture, consistency, aftertaste, and more. Just a few tries---basically, the definition of deceptively simple. I'm still pretty sure this is my biggest wheat-free success to date, 4 months in, and it's the one I started with.
Here you go, inline for now with a pretty basic PDF to download if that's easier. It's still only the first full week of school here (read about how we missed a day of school for food allergies already), so nothing is pretty or organized or otherwise ready to go yet. 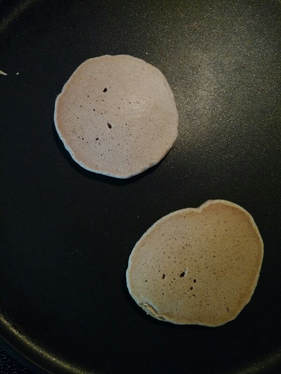
Just like wheat pancakes, oat flour ones bubble on top and brown on the edges.
INGREDIENTS:
1-1/2 cups oat flour 1/2 cup almond flour 1/4 cup cornstarch 1/4 tsp psyllium 1/4 cup sugar 1 tsp cinnamon 1/4 tsp salt 1 tsp baking powder 1/4 tsp baking soda 2 tsp lemon juice 2 Tbsp canola oil 2 Tbsp unsweetened applesauce 1/2 Tbsp water 1-1/2 cups water (divided in half) DIRECTIONS: Preheat a griddle (check for readiness: a drop a water should sizzle). In a medium bowl, use a wooden spoon to combine all dry ingredients. Make a well, and add the first four wet ingredients. Then add 3/4 cup water and stir to mix to a batter consistency. Slowly add in the remaining 3/4 cup water to the thickness you desire. Let the batter rest for a few minutes while you check the griddle. Make your pancakes as you usually would with wheat versions. For us, that means starting with a thicker batter and thinning it with water as we go along to make a spreadable, but not watery, round cake (two to a pan). Enjoy what you can, and then freeze the rest between layers of wax paper. Toast or microwave to reheat.
My next go or two:
I also decided that, just because I’m wheat free doesn’t mean we have to be chocolate free. Dessert is essential. We figured out brownies without eggs, which sounds unreal. I was sure I could figure out brownies without wheat, too. I tried three different varieties: rye was my absolute favorite, of course. I’m tweaking it with oats or sweet rice instead for those GF friends and hope to have both versions on the blog this fall. Another oat inspiration wagon we're jumping on is overnights oats. My oldest daughter and I are making a sporadic tradition of evening oat creations to replace our old favorite morning cereals. Look for that post this fall, too, with some of our oat toasting/type comparisons. Do you have any other outside-the-box ideas for oats or oat flours for us to try? Any tips on cups versus grams (I'm diving into that GF topic, too, while I'm at this.)? Reader InteractionsLeave a ReplyThis spring, I tried to get out of my safe-recipe rut (you know, when you just keep making the same old stuff that is good, and allergy-friendly, but you could do it blindfolded by now?) by seeking out new recipes to convert. I could browse food magazines for hours, and I hit upon a zucchini bread recipe and a cookie cake recipe that each had very little egg in the originals. At the time, I gave a quick mention on the blog and promised a recipe. Finally delivering (this is about my normal timeline for such things these days)! 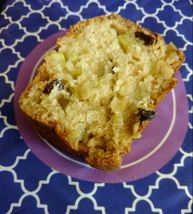 I've been changing a lot of my diet to wheat-free/yeast-free products this month. Oddly, that gave me the push I needed to really wrap up my collection of quick breads (with all-purpose wheat flours). Knowing that I have to tackle more kitchen experiments with alternative flours was the kick in the pants to get me to write down my traditional (for us: still egg-free, dairy-free, nut-free, and seed-free) versions.
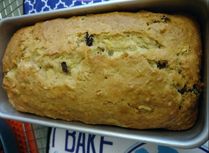
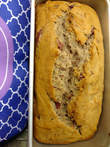
This zucchini bread is light and moist on its own, but a spread of homemade jam wouldn't hurt a bit! I was inspired to make and actually finish this recipe by my allergy shot nurses. I rely on them a lot to keep me healthy, and I tend to show my love and appreciation for others through food. They were a great help in settling on a strawberry bread recipe, and I got particularly good feedback about this mild zucchini bread, too. Click on the image below to open or pin the zucchini bread recipe! 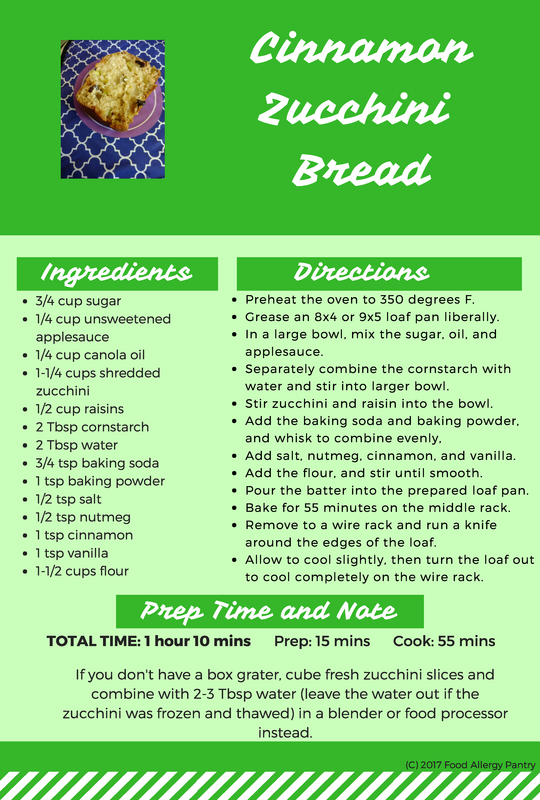
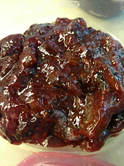
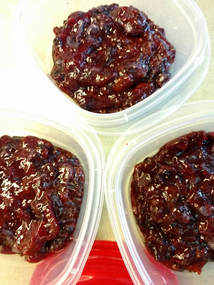 Chunky and thick, jam with Pomona's set up almost immediately. Just a few days after my standard jam making (with Sure-Jell pectin), I gave Pomona's Pectin a try with the leftover berries. The difference was really remarkable. Check it out: Instead of following the Sure-Jell directions for a single-berry jam, I decided to combine our picked, washed, and frozen blueberries and cherries this summer. My Sure-Jell adapted recipe set up nicely and made at least 5 pints of spreadable jam. I'd heard so many good things about Pomona's, though, that I had to give it a go. The Pomona's pectin box touts lower (and different kinds of) sugar, a variety of batch sizes, instructions to adapt to different fruits, and more. It comes with a packet of pectin just like Sure-Jell, but it also has a packet of calcium powder. I followed the directions for freezer jam for each type. They differed all around---in method, setting, taste, texture, storage, and maybe even cost. Method
Setting
Taste and texture
Storage
Cost
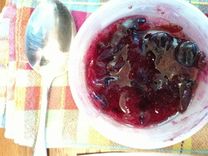
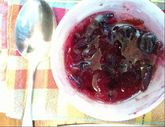
Have you ever made jam? What pectin do you like, and will you ever experiment with another method? You know something that is naturally gluten free? Not to mention free from milk products, eggs, nuts, tree nuts, seeds, soy, corn, fish, and all of those other persnickity food allergens? JAM. Specifically, fresh berry freezer jam. Doesn't even need a vehicle, just a spoon (or a surreptitious finger). 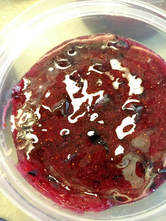 It turns out, a lot of people have never made jam before. They picture boiling canning jars, bacteria worries, hours in the kitchen. But it doesn't have to be so! I started making jams a number of years ago, exactly the way that my mom always did for me when I was young. I didn't know at the time that she followed the Sure-Jell freezer recipe every single year after her outing for strawberry picking. I'm not one to leave well enough alone, though, so I started exploring other berries, and other jam methods, after only a year or two of my own strawberry jams. Recently, I've tried the cooked method. No one here liked it as much. That fresh-from-the-fields taste of a freezer jam done well just can't be beat. Strawberry season has come and gone here (as has our jam supply from that). This year, we added blueberry picking into the summer, and I measured and froze washed berries in the hopes of making a midsummer berry jam. Today was that day! Or at least the first of the days. I ended up with enough blueberries, and a stash of pitted cherries, to make another round of jam after this one sets. Again, not content to stick with what works, I'm going to give Pomona's Universal Pectin a try on the next batch. Its instructions seem just as easy and more flexible than other options, and expert canners rave about it. 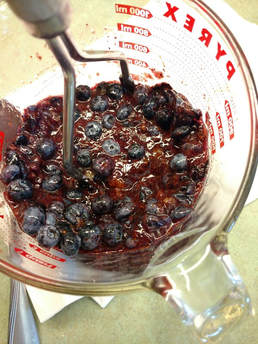 I'm posting my "recipe" for this thick and yummy cherry blueberry jam because I had to wing it on the berry and sugar quantities. If you've ever used Sure-Jell, Certo, or other jam-making pectins, you'll know that winging it is highly discouraged. But I set myself to some math calculations, crossed my fingers and toes, and got lucky. Here it is inline (aiming for a pretty printable added in later), with some notes inside and at the bottom for this version specifically and for jam making in general. I'm not an expert at canning anything, but that just shows how easy this freezer spread really is. Enjoy! :)  Ingredients 2 cups mashed (between 3 and 4 cups whole) blueberries (I use a potato masher and a large Pyrex measuring cup) 1 cup chopped pitted sweet cherries (I use the same measuring cup, and I use kitchen shears instead of a knife and block) 2 tsp lemon juice (I use a bottled version, and it isn't required for these berries but does help the pectin activate; I use it more often when I'm using thawed fruit I picked at least a month earlier) 5-1/2 cups sugar (don't be alarmed; it comes out to about 2 tsp per serving, which is how much some people use in their tea or coffee anyway) 1 box Sure-Jell original pectin (not the low-sugar version; currently, original is a yellow box and low-sugar is a pink box) 3/4 cup water (this mixes with the pectin, and I like to have it ready ahead of time) Items to have on hand a 4-cup liquid measuring cup (note that my liquid cup measures equal to a solid cup; test yours or scoop your prepared fruit with a solid cup instead) a 1-cup liquid measuring cup a small saucepan a very large mixing bowl---the largest you own a large spatula for the berries a small spatula for the pectin a timer washed and dried containers (I don't have consistent pint jars here; I have some of them in addition to some 3-cup jars, some 1-cup BPA-free plastic freezer containers, and an odd assortment of other glass containers that I use as small gifts after they're filled) Directions Follow the Sure-Jell directions (and estimated final quantity/container preparation) exactly, but use the different ingredient quantities listed above. I like to start with preparing the berries (add them into the large bowl). Then, I set the pectin into the saucepan and measure the water (setting it aside). At this point, I also set my timer for 1 minute so that it's ready to go when I turn it on. Now, I'm ready to add the sugar. About 7 minutes into the 10-minute sugar set, I start the water and pectin to high heat. As the mixture starts to boil, do not stop stirring! Turn on your timer at the rolling boil stage and don't let it linger long past that 1-minute mark. I have rarely stirred the pectin and berry mixtures for 3 full minutes, but it won't hurt to do so. Fill the containers as directed. Cool all of the filled containers loosely covered on the counter overnight. Then, stack your jars into the freezer for using and gifting all year long, whenever you are missing summer flavors. Blueberries (and cherries) are sometimes made without any pectin at all, because their natural pectin content can thicken them pretty well. That means my Sure-Jell version is already nice and thick even though it's just been a few hours. So, I'm off now to take my smallest jar, still slightly warm, and scoop it over my (finally) successful wheat-free dairy-free egg-free nut-free chocolate brownies waiting for me. Don't worry, that recipe is coming very soon, too! 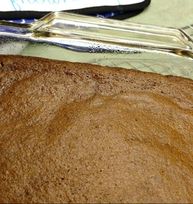 Darn near perfect fudgy brownies. Apparently, I just had to give up wheat to get them just right! Check out the round 2 update, made with Pomona's, and my comparison with it against the first (Sure-Jell) go.
If you’ve read any of these blog posts or come to my place for food, you’ll know that I rarely follow recipes even for baking and that I often try out random combinations on visitors and on my family. Sometimes this fails miserably, mostly it’s at least tolerable, and sometimes the results are just wonderful and worth keeping.
Now that I’m look for ways to replace poultry in my dinners without adding on more of the same red meat and pork options, I’ll finally start writing down and posting some recipes for regular meals, not just treats and snacks. Like my earliest baking posts, I’m short on photos and, frankly, short on directions so far, too. But it’s a start! This week, I stuck with beef, but a variant: lean ground veal. I used pasta as a vehicle, to stay in my comfort zone, and made a quick ragu that was hearty but also light enough for early summer. 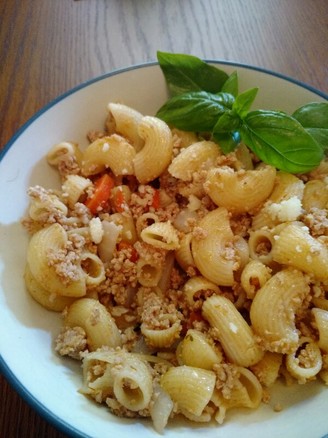
If you’d like to give it a try, here’s a quick how-to:
Ingredients 1-2 pounds ground veal 4 raw carrots, peeled, sliced, and diced 1/2 yellow onion, peeled, sliced, and diced extra-virgin olive oil (for sauteing) fresh garlic to taste (I used 1 clove) fresh thyme to taste (I used 3 sprigs) red pepper flakes to taste 1 pound boxed dried pasta (I used macaroni to capture the ragu), cooked al dente and drained/ready to use. 1/2 can tomato paste, diluted with water until able to stir easily *optional: salt or seasoned salt to taste (or replace with pecorino cheese at the end if you aren't a dairy-free household) fresh basil Directions In a medium saucepan, saute the onions and carrots on medium heat in the olive oil until softened but not brown. Add the garlic and saute only briefly. Then move all ingredients to the side of the pan. Add the veal to the pan and stir to break up large pieces. Slowly incorporate the onion, garlic, and carrots into the veal. Sprinkle the mixture with the thyme and stir to incorporate. Add the tomato paste (I used just enough to lightly coat the veal, not enough to make a heavy ragu.) and red pepper flakes. Turn the heat to medium-low and stir until warmed. Add the cooked pasta to the veal mixture and coat the pasta with the ragu. Serve with extra red pepper flakes and some fresh basil. I’d like to add more fish and veggie/bean options down the road, but I think baby steps are called for right now. Next week, I’m trying loose sweet Italian sausage (lower fat for heart health than in casings, especially if you drain the cooked meat) in cannelloni shells. My thinking is that I can make enough to have leftovers for me on the days that my family eats chicken. If I have to eat pasta more days a week, I’m sure that I can suffer through it! ? 
|

Hi, I'm Nicole. 
ABOUT THE BLOG An apothecary is a person or a place. Either one implies healing and relates to pharmacy in its truest sense, as a source of treatment and advice. This blog is my way of uniting my pharmacy training with my efforts to provide a healthy and safe lifestyle for my family. In true apothecary form, I research and prescribe alternative ingredients that work just right in each specific recipe, and I would like to share the results with anyone who needs help making their own family’s kitchen allergy safe and heart healthy. Categories
All

I made the 2017 Top-40 Food Allergy blogs!


Nicole Van Hoey's books on Goodreads
 Bakery Bites: Breads and Treats Without Dairy, Eggs, Nuts, Seeds, or Soy
ratings: 1 (avg rating 5.00)
|


 RSS Feed


