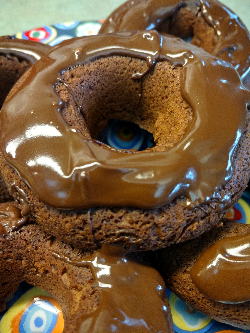
Friday night pancake dinners are not unusual in our house, any season. This week, I realized what was missing from our already-carb-heavy meal: Doughnuts!
In December, I found a pan for full-size cake doughnuts. But I was still recovering from open heart surgery (more on that in another post, perhaps? back to chocolate for now...), so I wasn't able to use the oven. That door is heavier than it seems when you are rebuilding all of the bone and muscle strength in your upper body! It's mid-January and I'm still not back to my old self in the kitchen, but I'm getting there. I was looking for some inspiration this week and came across the Gluten-Free Palate's Vegan Chocolate Espresso Doughnuts on the Enjoy Life Twitter feed. What could be better? We know people with celiac disease, so I'm holding onto the gluten-free version for sure. For my first try, though, I re-glutenized the recipe and used my own go-to egg replacement (cornstarch + applesauce) because we were out of flax. I also left out the espresso, so that my kids would go right to bed (ha!). The recipe was so easy, and my results were tasty even the next morning. 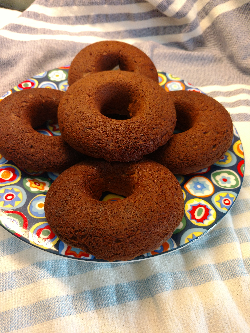
I did notice that these doughnuts (made with wheat flour, at least) are pretty crispy on the outside, but they are nice and airy without feeling dense at all. When I tried a shorter cooking time on a second batch, they were a touch softer but also prone to falling apart when I turned out the pan. This---and the lack of pretty smoothness on the doughnut bottoms---probably reflects my impatient technique more than anything else, though!
I'll definitely be using this recipe again and experimenting with my own versions and new flavors on some other Friday pancake nights. I also loved the larger doughnut size, compared with a mini-doughnut pan that I tried in the past. 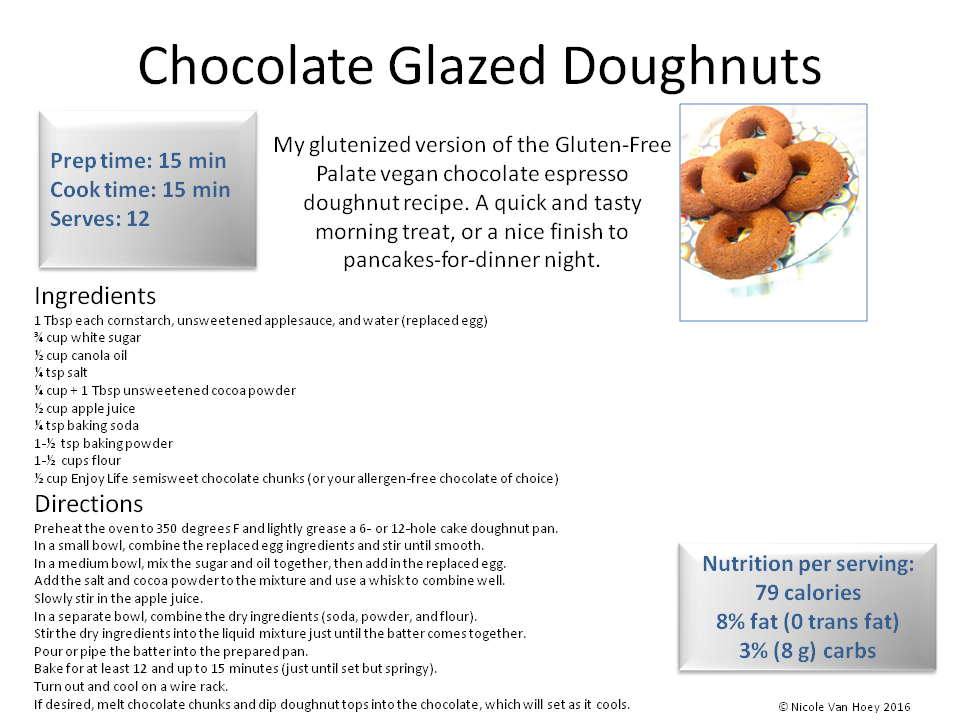
Do you have any favorite doughnut recipes to share? Any tips to soften up some eggless baked goods that aren't naturally heavy on fruit purees?
2018 update: Looks like I might be going back to the gluten-free original recipe. For now, though, I'm linking my wheat-flour otherwise-allergy-free recipe on FreeFrom Fridays. Enjoy :-)
3 Comments
When I was a kid, my summer vacation was filled with biking to the park, picking wild blackberries, and hanging out with my grandpa, playing card games or just talking. My grandpa always stocked all of the grandkids' favorite treats, and his freezer was an open door each summer to icees, dilly bars, and those popsicles with fake cream inside...and, my favorite by far, the fudgsicle!
Looking back, I miss all of it, and I want my own kids to have a taste of that idle happiness between busier and longer school years. So. I decided this year, to end my oldest's last day of elementary school and to celebrate with a new treat that was safe for my youngest, that I would remake fudgsicles...but I left myself only 2 hours to make this happen before school let out. 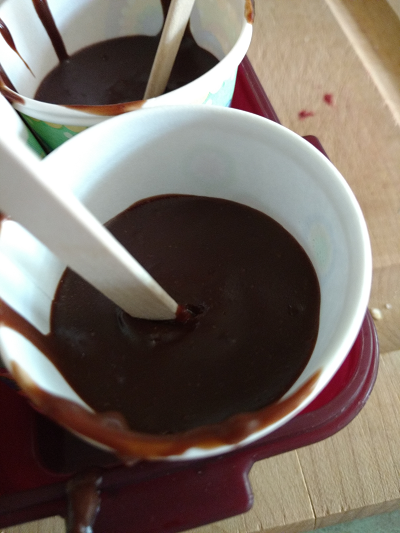
The process on this first attempt wasn't the neatest, I'll admit. But the taste was delicious (even after just a few hours, when it was still at the mousse-y pudding pop stage). This first go is adapted from Parade's Community Table adult Mexican dark chocolate bar, which was in the June 5, 2016, edition of the metro DC insert. Unprepared as I was, I had nothing as fancy as actual popsicle molds on hand. But I did have a drug store across the street that sold boxes of Dixie cups for $1---another remnant of my childhood. 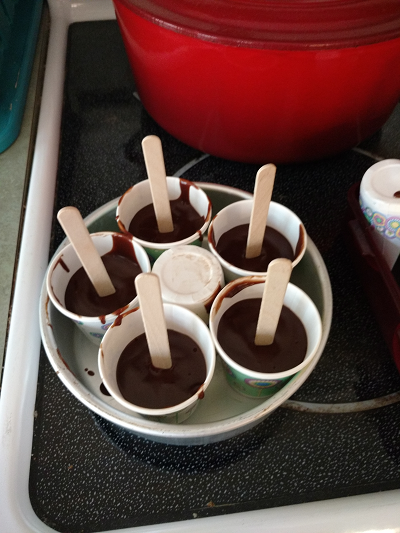
And did I remember to grease the cups or do anything to make it easy to slide out the frozen deliciousness? No, I did not. I poured these suckers in and ate the first one with a spoon before I ever froze them, just because I could. I did double-up the Dixie cups in case a single-layer would be too soggy (it wasn't). It turns out that these are easy to remove, because you can just tear a paper cup right off while you hold the fudgsicle stick. 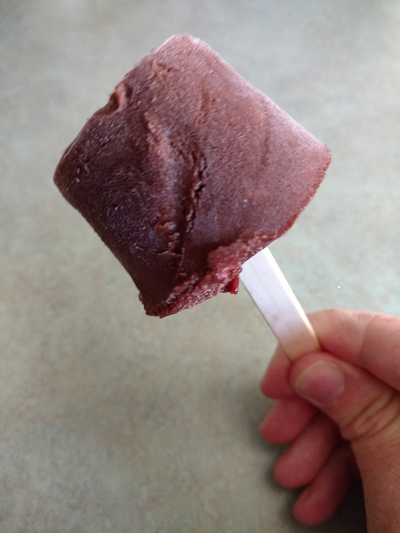
Chocolate School's Out Fudgsicles
Ingredients
2 Tbsp unsweetened cocoa powder 1/3 cup sugar 2 Tbsp cornstarch 1/4 tsp salt 1-1/2 cups soy milk 1/2 cup coconut cream 1 tsp vanilla 1-1/2 ounces any safe semi-sweet chocolate chips 1/4 tsp cinnamon At least a dozen Dixie cups and popsicle sticks. Directions Before you begin mixing ingredients, prepare the Dixie cups by placing double layers of the cups tightly into a baking pan or plastic container, and have the popsicle sticks ready to insert. Combine the cocoa powder, sugar, cornstarch, and salt in a saucepan. Whisk in the milk and cream and stir often. Bring the mixture to a boil over medium heat and cook at a boil for 1 minute. Remove from heat and stir in the chocolate chips, vanilla, and cinnamon. Pour the mixture into the Dixie cups, and stand up a popsicle stick in each cup. The amount made depends on how deep you pour these out. I made about 10 chunky-sized fudgsicles. Place the container of Dixie cups in the freezer and freeze for at least 3 and ideally for 6-8 hours.
My only concession to our usual Free-From ingredients is the coconut cream that I used to replace the fat that would have come from the usual dairy. Soy, almond, and rice milks alone just can't compete on fat content, which is needed in this recipe not only for that creamy mouth feel but also to actually harden up and stay together. Coconut is not *technically* a tree nut, but if you avoid it and adapt this recipe, please let me know what worked for you instead!

Sorry, today's post is not about celiac disease or gluten sensitivities. It's about actually running out of flour. Plus, I have been itching to use the interrobang in a blog title. :)
We've had a heck of a month (again). But we're still trying to fit in those peaceful times with friends when the craziness of the day can fade away for a few hours. Because we're the family with the most food restrictions, a lot of those friend visits happen on our turf, though, and we usually make treats to share with visitors. Well, grocery shopping has been SO LOW on my to-do list this month, and we wanted to make brownies and relax with one of Jo's teacher friends the day after returning from yet another car trip. Naturally, I started planning this baking adventure about 10 minutes ahead of the time it would take for the brownies to be ready. We got out our aprons, preheated the oven, and hit the pantry. That's when I realized we had about 2 pounds of sugar, but not even a cup flour, in the house. Did you know that there's an easy replacement for flour that is probably already on your shelf right now? If your "pantry" is like mine, it's a kitchen cabinet overflowing with bags and boxes of things you used once or twice and forgot about...chick pea flour? fine-ground cornmeal? lots of half-bags of marshmallows, shredded coconut, safe cookie butter. Also, at least half a box of pancake mix. Aha! With a few simple changes (or not), almost any safe pancake mix can take the place of flour in a lot of baked goods. This is because mixes often are just flour, some powdered leaveners, flavorings, and preservatives, sometimes some vitamins. Usually, replacing flour with pancake mix doesn't even change the taste or texture, especially in bread or muffin recipes. 
My budding baker, many years ago...she's much bigger than the counter now and doesn't even need a chair!
This was Jo's first kitchen experiment in real time with me. We decided on chocolate mini-muffins: quick baking, with some extra dry ingredients (cocoa) to round out the whole-wheat pancake mix that we used. In a rush, we didn't change anything about our flour-based muffin recipe on this try.
Download or view the artistic version of our instructions below, courtesy of the family's youngest artist and baker. 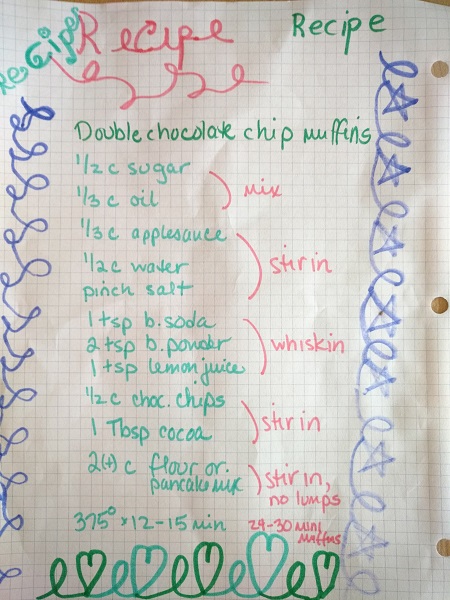
Without getting too science-y, using equal amounts of pancake mix for flour does change the gluten-to-rise ratio just enough that your muffins will rise a lot in the oven but be a bit flatter than expected after they cool. Not a big deal for home cooks, but here's a quick adjustment to try if you are aiming for the prettiest version:
In a given recipe made with mix instead of pure flour, decrease the baking powder or soda that you add by 1/2 to 1 tsp (approximately proportional to the flour content, with a 1/2 tsp decrease for every 1 cup of flour). Extra cocoa powder never hurts, either. Or just roll some coconuts in cookie butter and sugar, call it a day! 2017 update: I'm adding this post to #FreeFromFridays as I revisit some old favorites and switch them (I hope) to a wheat-free version. If you try it as is or with a GF mix, I'd love to hear how it turns out for you! 
Happy Easter weekend! Because we spent most of our break traveling, I am focused on easy dinner and dessert options this year. Besides, with such beautiful weather and cherry blossoms at peak bloom, who wants to spend all day in the kitchen?
My family might have had ham when I was young (not my favorite, so I probably blocked that out), but what I remember is the lasagna and Italian bread. Now that dairy is literally off the table, we stick with the traditional (but slow cooker) ham and green beans dinner, though I try to up the flavor (and fiber) with fig dressing and mandarin oranges on the beans and a spinach and cranberry salad on the side. To get outdoors with everyone else as much as I can on the holiday weekend, I stick to make-ahead desserts, too. Today, here are two options for quick dinner desserts or brunch features, which should fit anyone's holiday plans---even procrastinators': For the planners, try my monkey bread/cinnamon roll. All of the prep occurs the night before, so the sticky goodness is only a 20-minute oven bake away for your brunch. If you get started in the morning, there is still plenty of time to feed the after-dinner crowd. If you'd rather wait until after dinner is in the oven to get started, here's a quick box mix--heavy recipe that can be customized for different flavor preferences or items on hand. This is not a healthy option, by any means, but it is a sweet treat wih minimal prep and oven time. My family requested lemon flavor this year, but chocolate + a cola or spice cake + pumpkin puree could work as well. The premise of my version is a mash-up of the widely mentioned 7-up box cake and an internet description of the Westporter pudding cake. No pictures today, because I am going with the last-minute effort. Enjoy! Preheat the oven to 350 degrees and spray or grease a bundt pan or cake pan of choice. In a large bowl, combine 1 box safe lemon cake mix, 1 3.4-ounce box lemon pudding, 6 tablespoons flour, 1 1/4 teaspoons baking powder, 1/2 cup oil, and scant 1 1/2 cups sprite (or 7-up or ginger ale). Stir for up to 2 minutes but not longer (even if still lumpy). Pour the mixture into the prepared cake pan and bake according to the box directions (here, 50 minutes). Cool in the pan for 20 minutes before turning the cake out to ice or powder and decorate. Before we had kids, my husband and I used to stay at bed-and-breakfast inns (at my request) and indulge in long breakfasts full of yummy homemade (by someone else!) pastries. Although we try to follow a very heart-healthy diet in addition to watching allergens, there are just some mornings that scream for a dense, warm loaf of carbs slathered in (fake) butter. Here in the DC area, we've had a run of those kinds of days, so I'm sharing our well-tested oatmeal breakfast loaf. 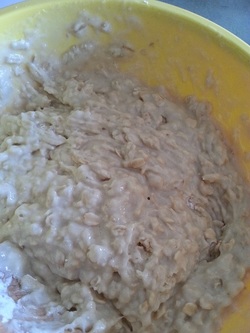 Unlike most quick breads that I make, this one is sticky and thick as a batter and just as dense when it's ready to slice. The oats add a healthy touch, but the balance really tips toward a sweet treat with the maple syrup content. Although the recipe here calls for only oats, it's easy to add in dried fruits like raisins or dates to change the texture and fiber content. 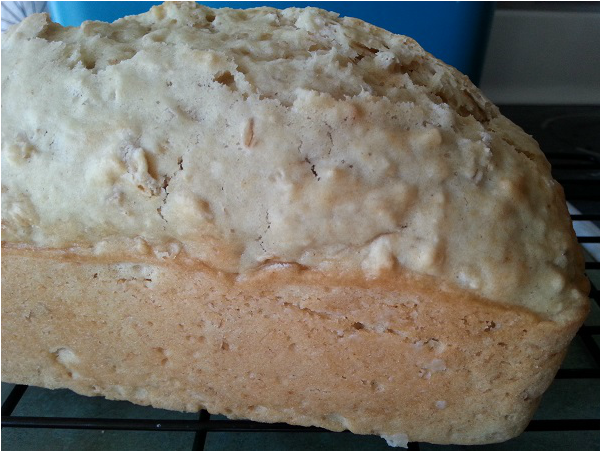 This oatmeal breakfast loaf is easy to slice while warm and also reheats well. You can wrap it in wax paper and foil to freeze like other quick breads, or you can slice it and keep sealed. The last slice will be gone before the bread even starts to lose its moistness. Enjoy! 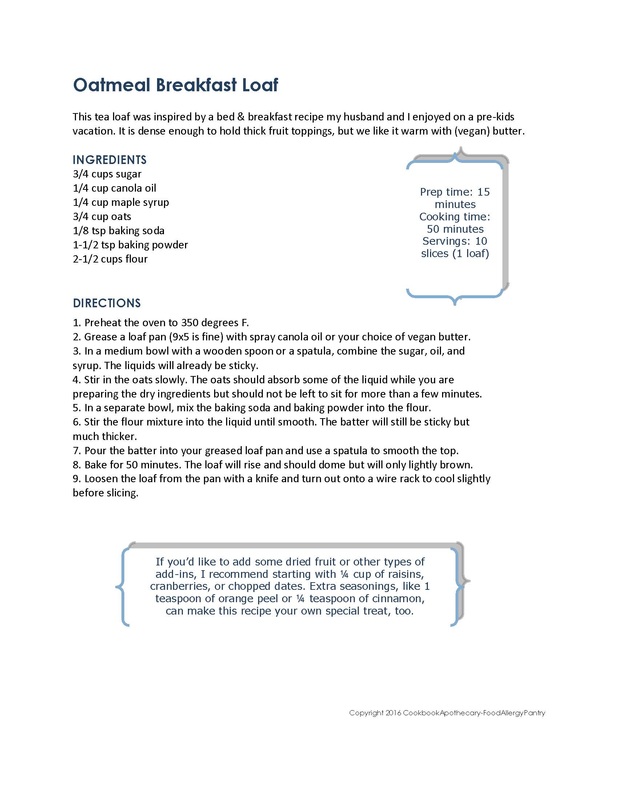
I love baking anytime, but I admit that fall is usually a baker's favorite time to be in a kitchen. Summertime for me, though, is still the season when I can spend extra time with my girls. When my food-allergic girl was a baby, I was sure we would never be able to share cookie making and the like. Almost 8 years later, we are all dusting cupcakes together! To celebrate baking with your food-allergic kid, and summertime sunshine, try this recipe for Key Lime Cupcakes (+/- some coconut if it is allowed). They are fun to mix, and they only cook for <20 minutes, so you won't spend all morning in a hot kitchen. 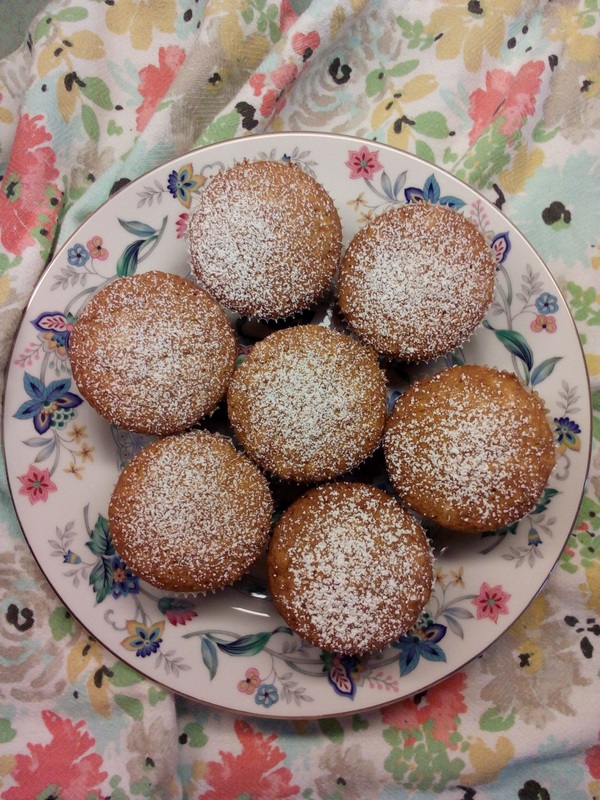 Ingredients: 1/2 cup boxed Key Lime pie filling (we tried both Oeteker and Southern comfort) 2/3 cup sugar 1 tsp vanilla 1/3 cup canola oil 1-1/2 Tbsp jarred unsweetened applesauce 1/2 cup shredded sweetened coconut flakes (optional) 3/4 cup water 1/4 tsp salt 1 tsp baking soda 1 tsp baking powder 3/4 tsp lemon juice 1-1/2 cups flour I meant to get a picture of how much this batter bubbles as you stir, but we were having too much fun singing the Lava short song while the batter fizzed! Directions: Preheat the oven to 400 degrees F. Prepare a 12-cup muffin tin (line, spray, or both). In a medium mixing bowl with a wooden spoon, combine Key Lime filling and sugar. Add vanilla, applesauce, and oil, and stir. If desired, stir the coconut flakes into the batter. Slowly stir in water (I think lemonade would be great here too -- just use less white sugar to start). Add salt, soda, and powder, followed by lemon juice, then stir lightly with the spoon or a small whisk. (Professional bakers: feel free to sift these dry ingredients into the flour first. My kids just love the acid-base bubbles too much, so I make sure to lightly whisk any clumps after the oohs and AAAS are through.) Fold the flour by half cups into the batter. At this point, the bubbling grows! Pour the batter into the cups up to 3/4 full. I like to use a 1/3 measure cup as a spoon to fill my pan. Bake for 18-20 minutes, cool for 2 in the tray, and remove to a wire rack to cool ccompletely. 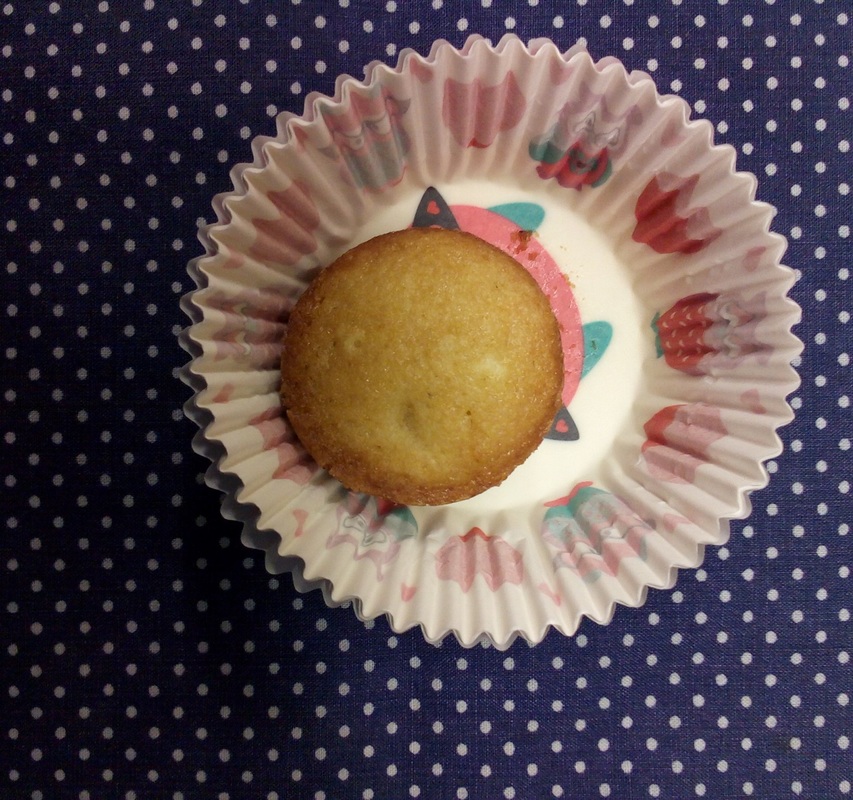  We had just enough batter left to make ~6 mini-muffins too. These cooked in just 9 minutes (don't forget to put water in the empty tin cups) and were delicious right out of the oven! My girls decided that they want these every day now. :-) After your cupcakes cool, ice as desired (we have tried lime gelatin sugar frosting!) or let the lime and coconut flavors shine through with a simple powdered sugar dusting. 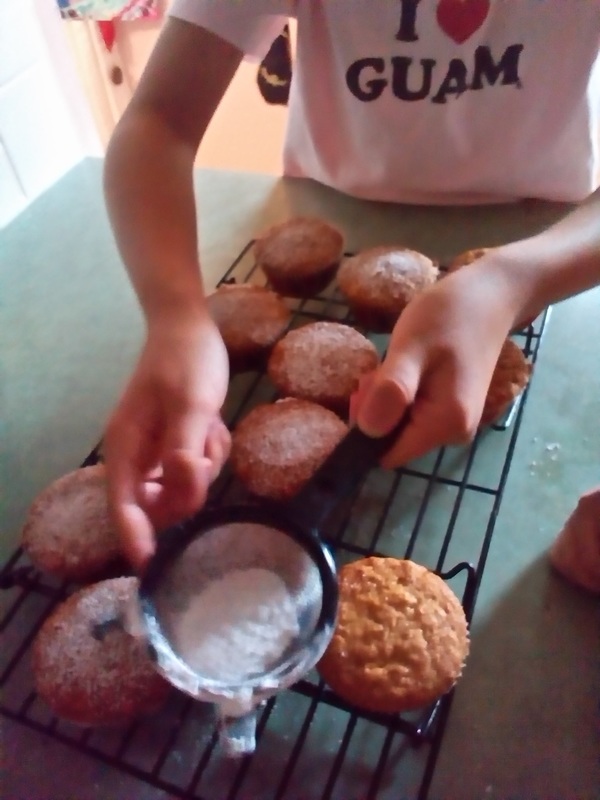 |

Hi, I'm Nicole. 
ABOUT THE BLOG An apothecary is a person or a place. Either one implies healing and relates to pharmacy in its truest sense, as a source of treatment and advice. This blog is my way of uniting my pharmacy training with my efforts to provide a healthy and safe lifestyle for my family. In true apothecary form, I research and prescribe alternative ingredients that work just right in each specific recipe, and I would like to share the results with anyone who needs help making their own family’s kitchen allergy safe and heart healthy. Categories
All

I made the 2017 Top-40 Food Allergy blogs!


Nicole Van Hoey's books on Goodreads
 Bakery Bites: Breads and Treats Without Dairy, Eggs, Nuts, Seeds, or Soy
ratings: 1 (avg rating 5.00)
|
||||||
 RSS Feed


